
CONTACTS
Upload a CSV File
Upload a CSV File
Whether you’re moving your business or starting something new, you’ll need to import your current customers or leads to our system to get started.
In this guide, we’ll cover how to import your list using a CSV file. You’ll need to export your list from your current CRM and create CSV doc (a file that ends in .csv, not to be confused with an excel spreadsheet) before you begin.
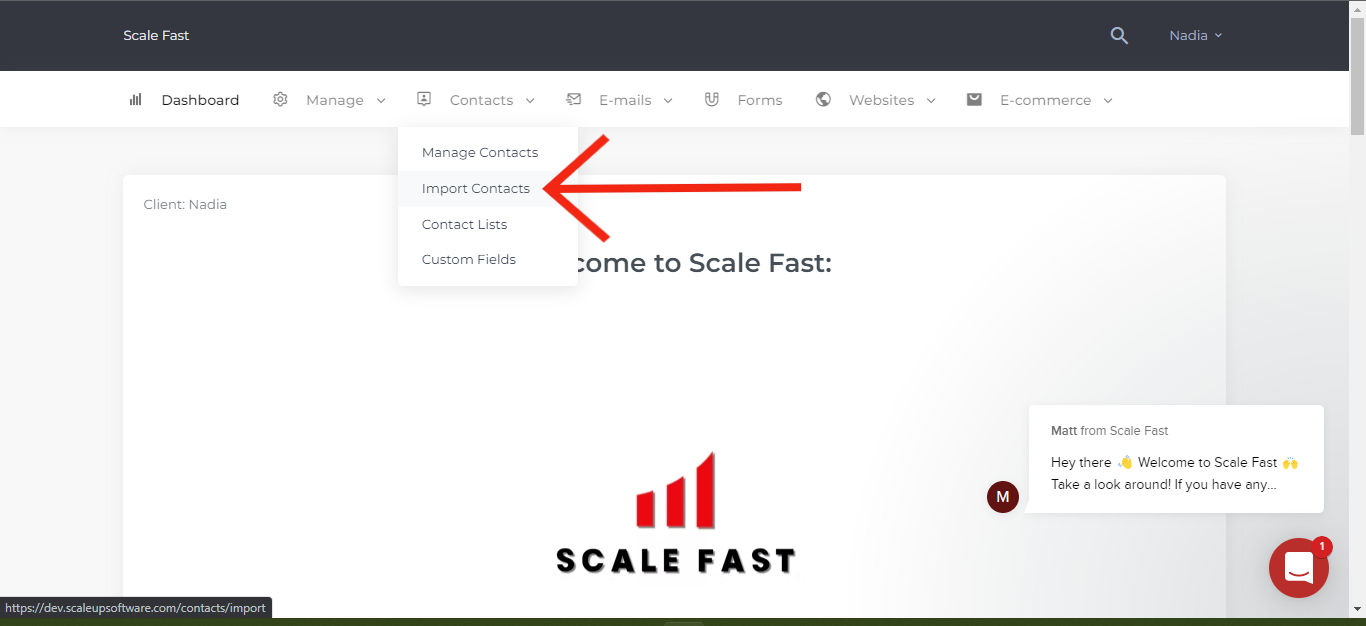
First, login and navigate to your user dashboard. Under the “Contacts” tab, select “Import Contacts”.
This will open a page for you to select your CSV file.
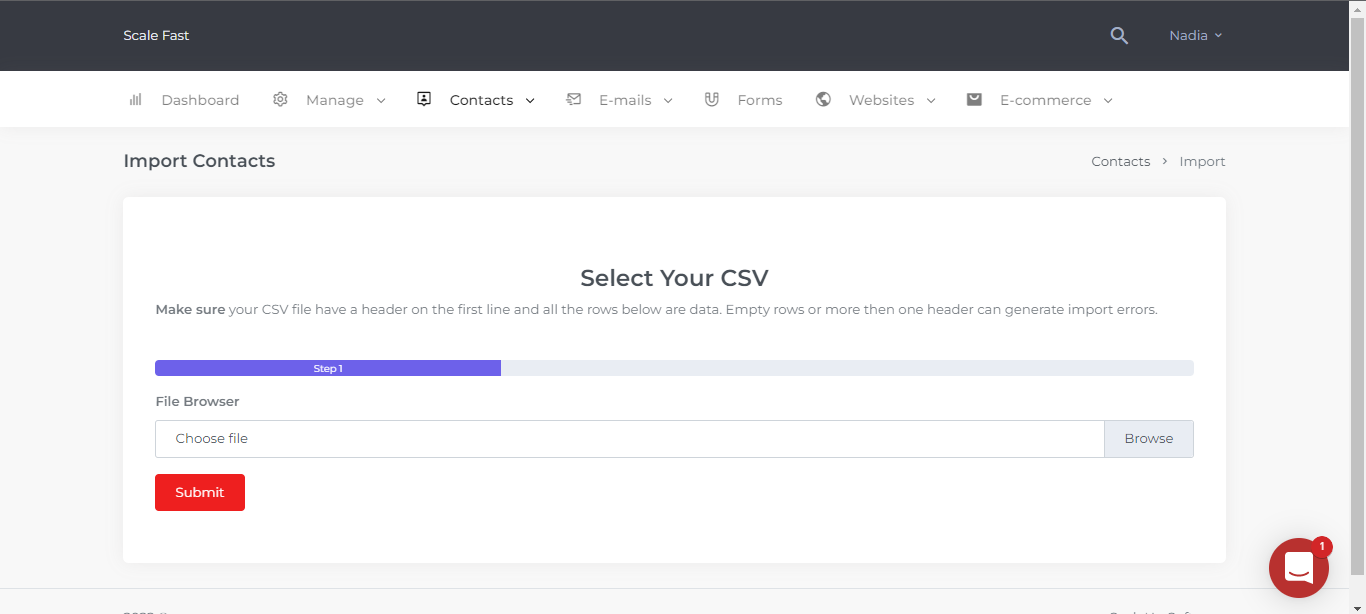
Browse for the file you want from your folders and open the file. Your file must be a .csv or .txt type.
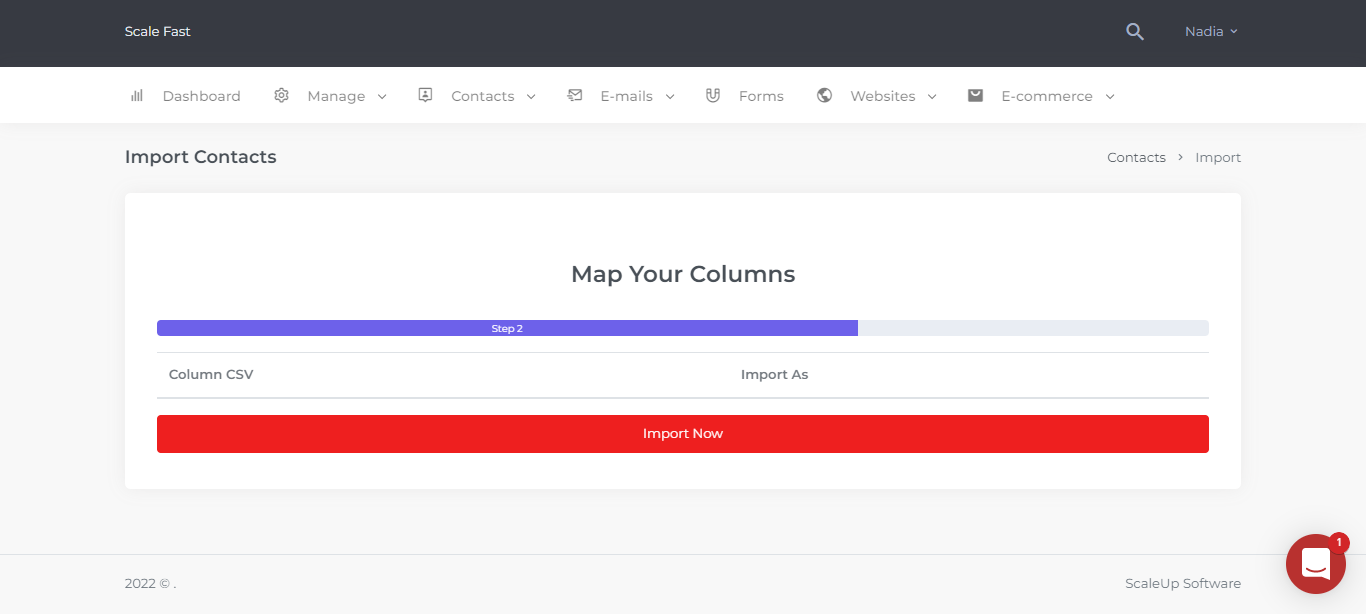
You will be taken to the “Map Your Columns” screen where you will select “Upload Now”.
If you received an error, double check that your document contains only one or more of the following default fields:
- First Name
- Last Name
- Phone
- Address One
- Address Two
- City
- State
- Country
- Post Code
- Notes
- Ignore this Column (Custom Field)
If done correctly, the “Map Your Columns” screen will populate with your added data as seen below.
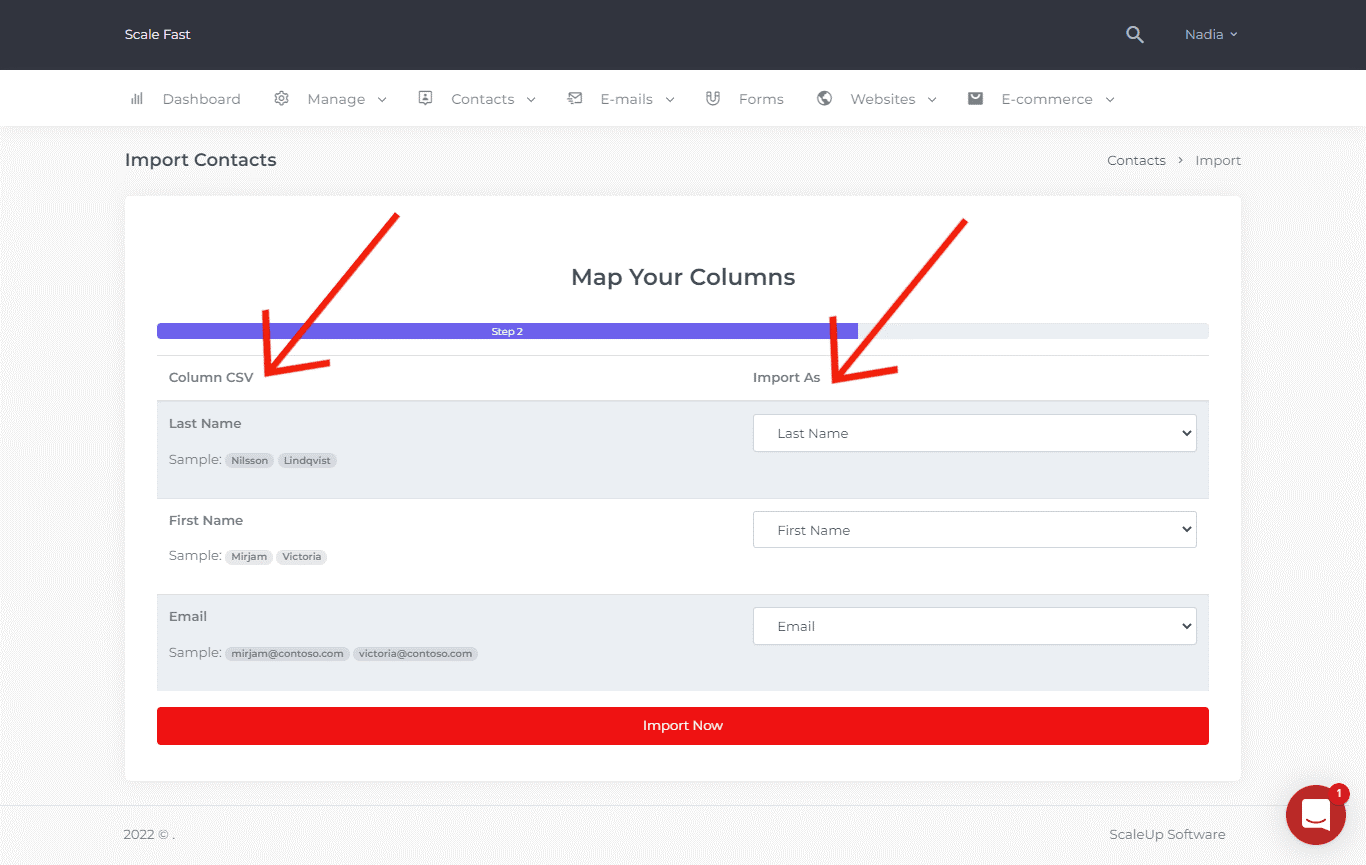
Check that your “Column CSV” matches your imported CSV file columns. The system will always load a few samples for you to preview. Under “Import As”, adjust the Default Fields as necessary. Once you’re satisfied, select “Upload Now”.
During importing, please don't close the page. If your file is large, it can take up to 15 minutes to show your results.
Once your import is complete, you’ll see the following completion screen:
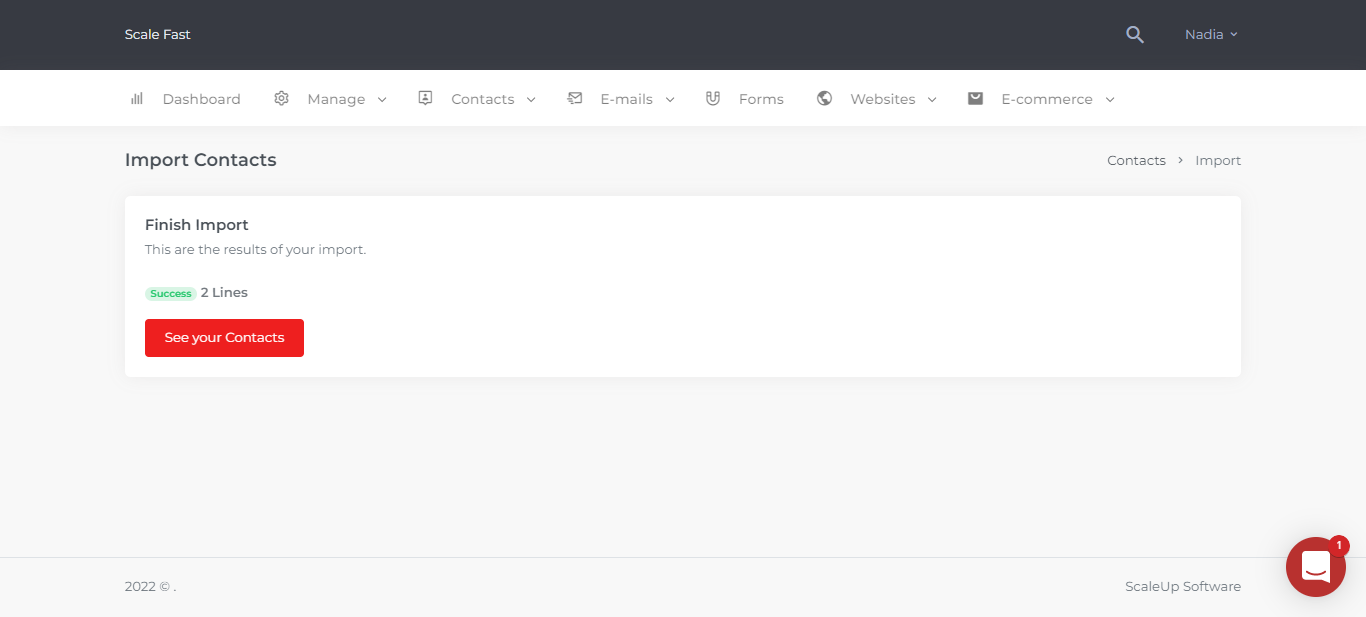
Select “See your contacts” to verify your import and to manage your contacts.
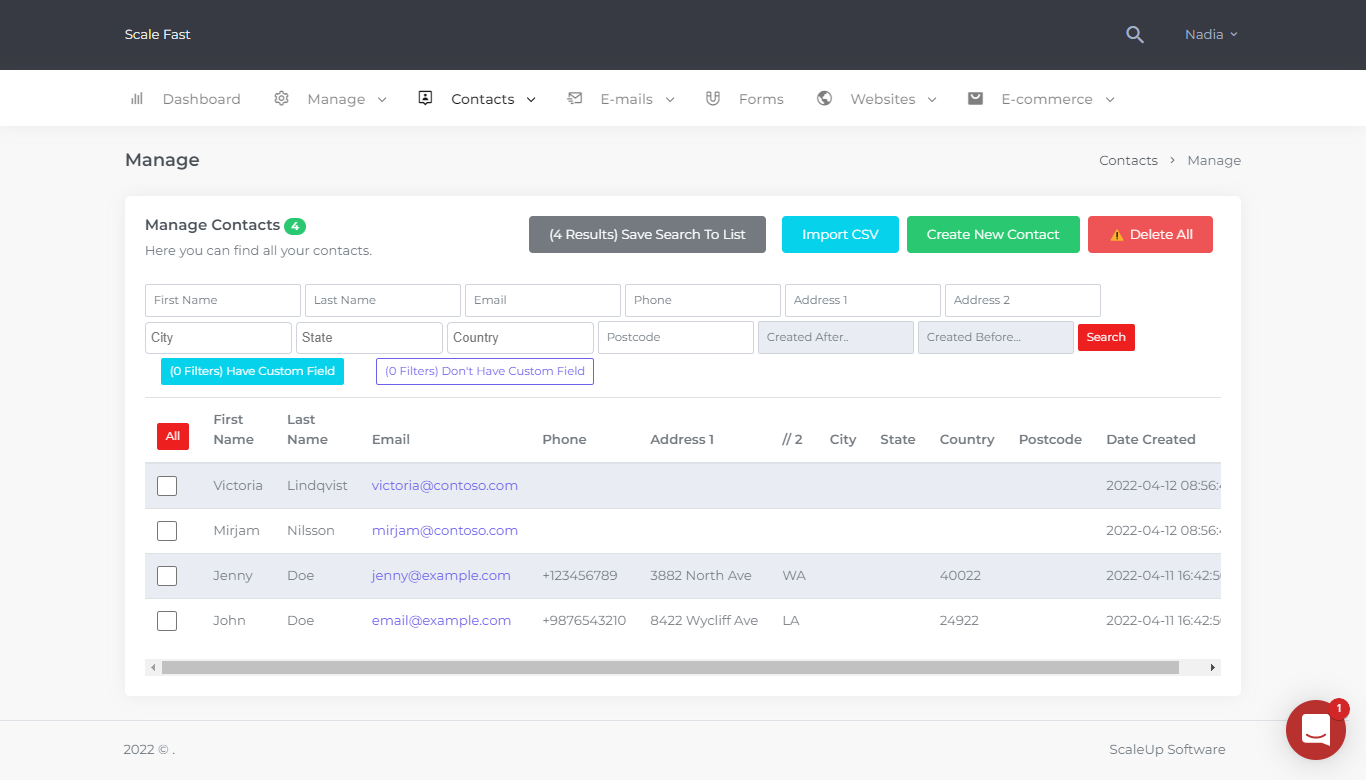
From this screen, you may
- View your contacts
- Import a new CSV file
- Create a new contact
- Delete contacts
- Search for a contact using any of the default fields, including “Created After” and “Created Before” options and custom fields
You also have the option to save your search results with the “Save Search to List” option.
To view your list, select “Contacts” from the main tab and choose “Contact Lists”.
To create a custom field, go to the “Contacts” main tab and select “Custom Fields”.
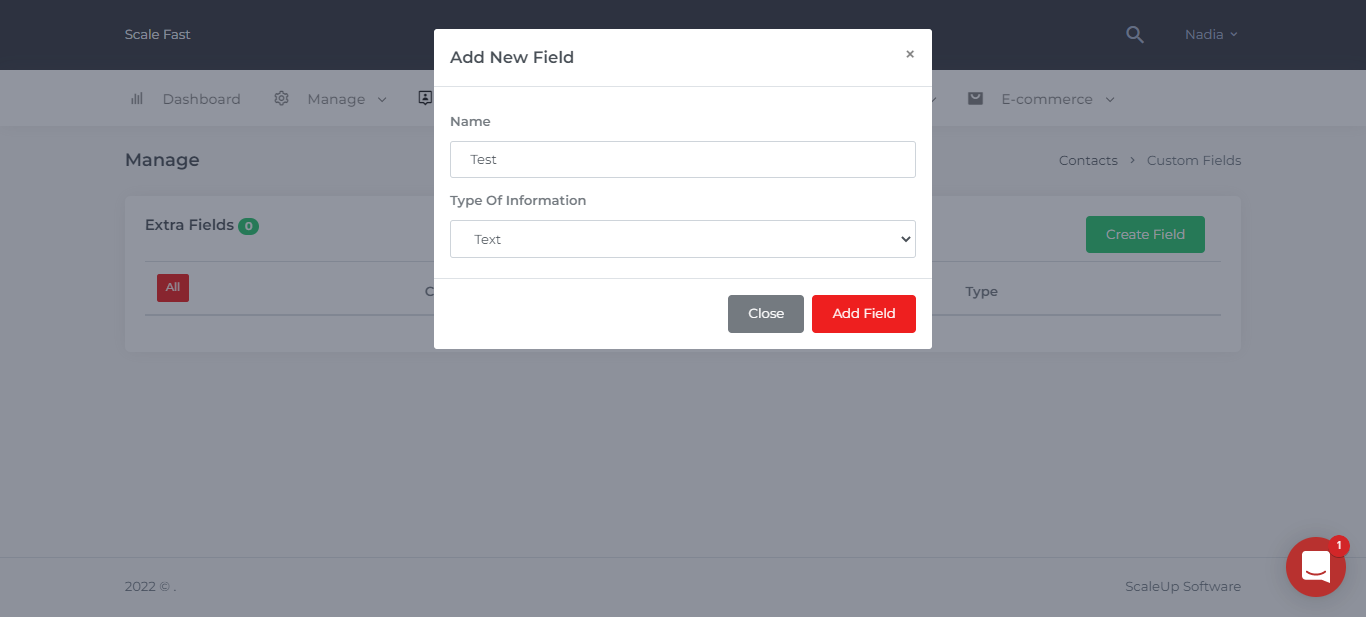
Click the “Create Field” button to choose a name and type for your field. The options for the type include:
- Text
- Message
- Select One Option*
- Select Multiple Options*
- Radio (one of some options)*
- Confirm
- Numeric Value
- Date
- Date & Time
- Time
The options above marked with an asterisk (*) will open an option for you to add your selections.
When you’re done, select “Add Field” to create your custom field.
Do you still want help?
Get in touch with us and we will respond within 24 hours and help you with your problem.

The All-In-One Software For Running & Scaling Your Business
CONTACT
Head Office:
Level 44, B1,
Kuala Lumpur, 50450
Malaysia