
AUTOMATION
How to Create an Email Follow Up Sequence
How to Create an Email Follow Up Sequence
This tutorial covers how to create an email follow up sequence with the Automation feature of Scale Fast.
By the end of this tutorial, you will be able to set up a pre-prepared sequence of emails to be sent out to your leads at intervals that you control.
You will also be able to use the Tags feature to filter your leads into segments based on their progression through your sequence.
Finally, you will be able to view statistics about the conversion rates of different steps of your sequence.
Table of Contents
1. Creating a Sequence with the Automations Feature
2. Adding Steps to Your Sequence
3. Filtering Leads Using Tags
4. Your Completed Sequence
Creating a Sequence with the Automations Feature
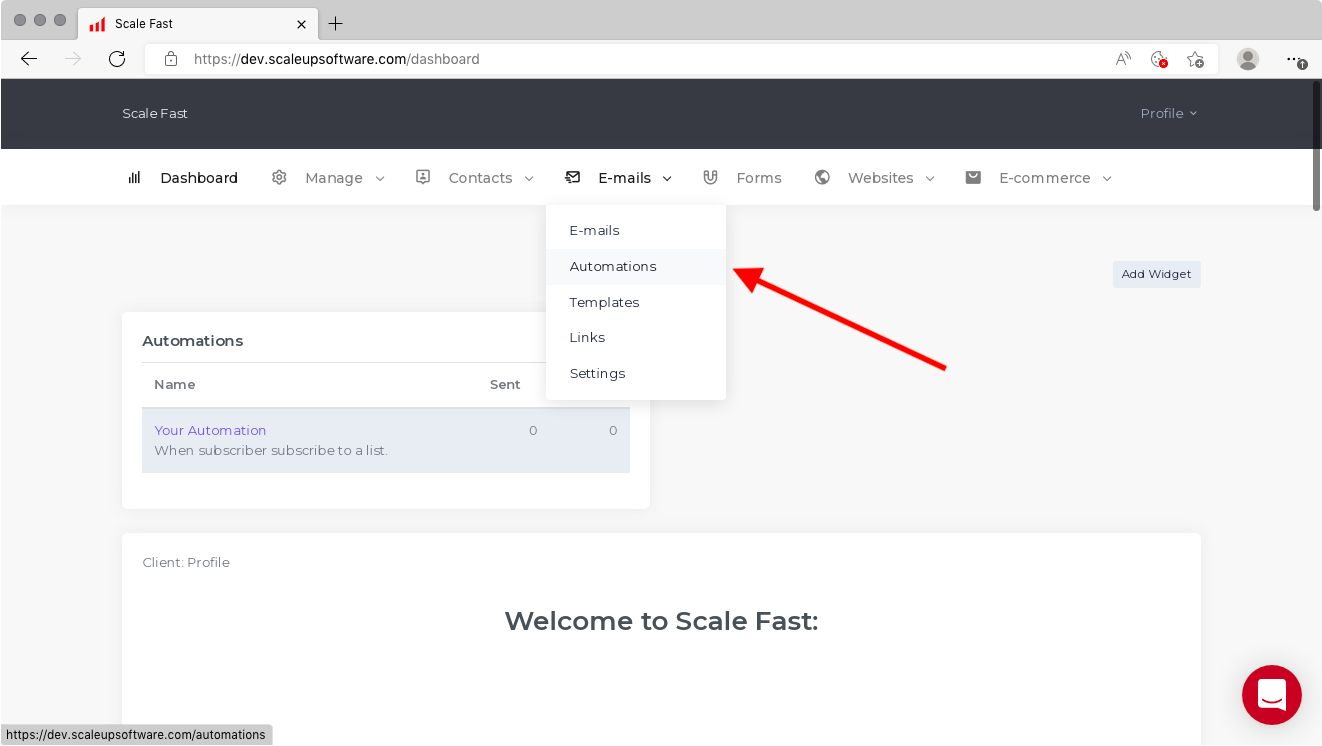
From the menu on your dashboard, click on E-mails, then Automations.
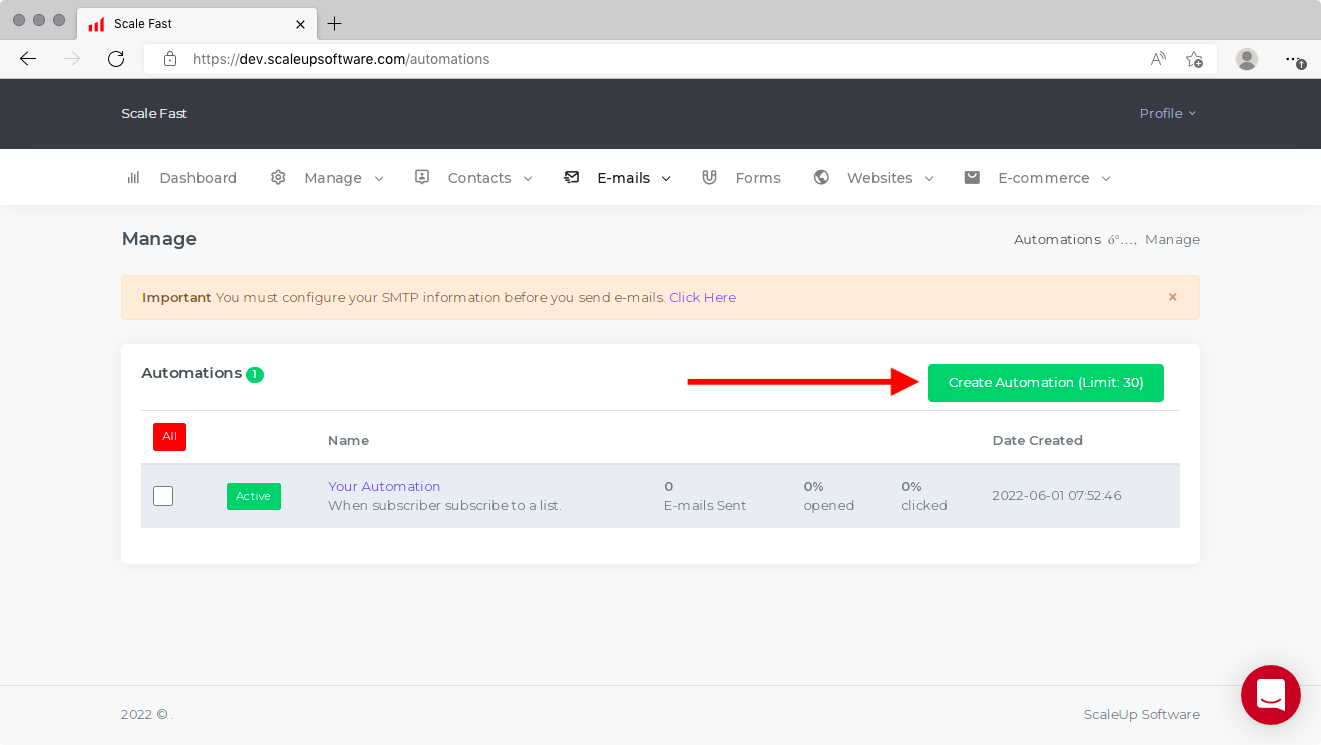
If you have already created any automations, they will be listed here, along with some basic statistics about the automation. To create a new one, click on on Create Automation as shown.
You will be greeted by the screen below. Again, there will be some basic statistics at the top of the screen. Since this is a newly created automation, you should expect all the numbers to be 0.
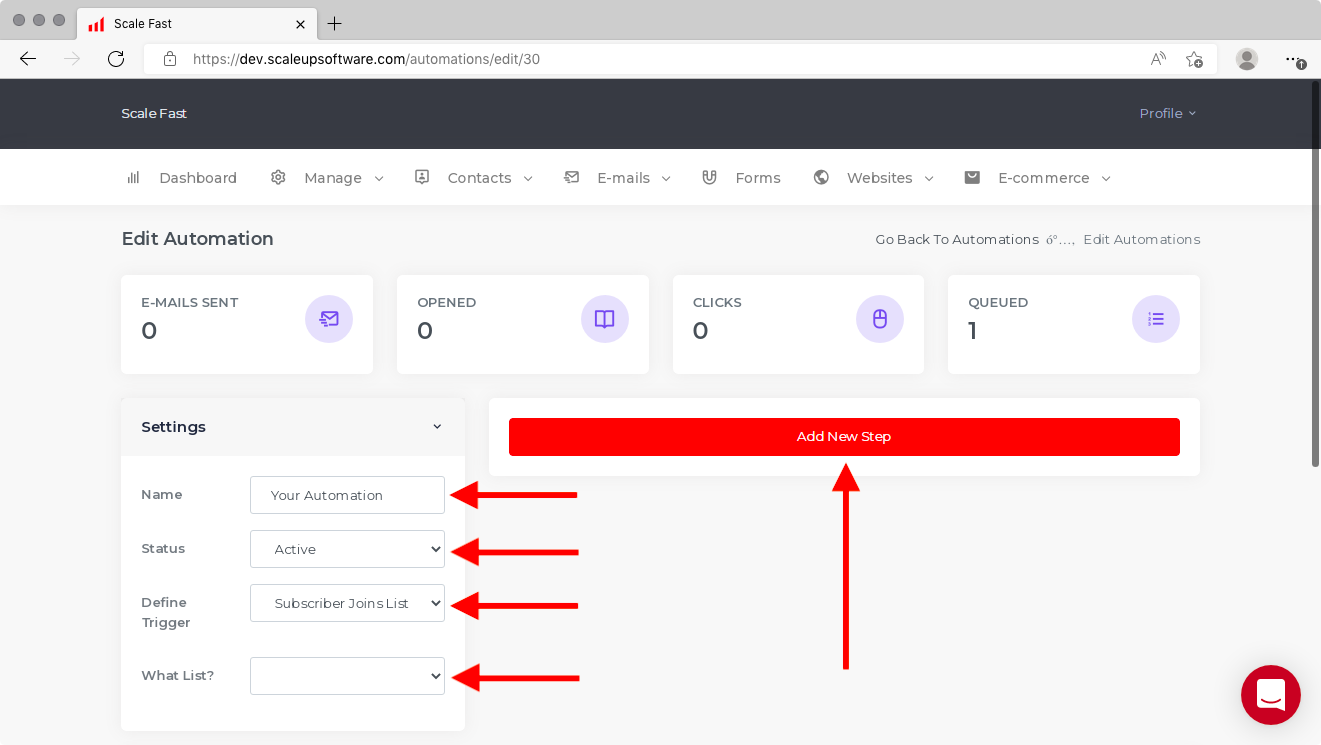
Also, you will see the Settings section, with some different fields for you to complete.
Name: You can name your automation here, which will help for organisation purposes if you plan to create more than one. Your leads and customers will never see this.
Status: Set the automation to Active to enable the automation triggers to happen. They will not happen if you set it to Inactive.
Define Trigger: When the status is Active, this is the event that will trigger your sequence of emails to be sent to a lead. It can either be the addition of a lead to a list (see the Lists tutorial for more details), the completion of a form by a new lead (see the Forms tutorial for more details) or the addition of a tag to a lead.
After you defined the trigger, you will need to specify in the final drop-down which list, form or tag.
Note that the list, form or tag needs to be pre-created before you set up the automation. For a guide on creating a tag, see below in this tutorial. For lists and forms, see the relevant tutorials linked above.
Adding Steps to Your Sequence
To add steps to your email follow up sequence, click on the Add New Step button shown in the screenshot above.
You will then see the following screen:
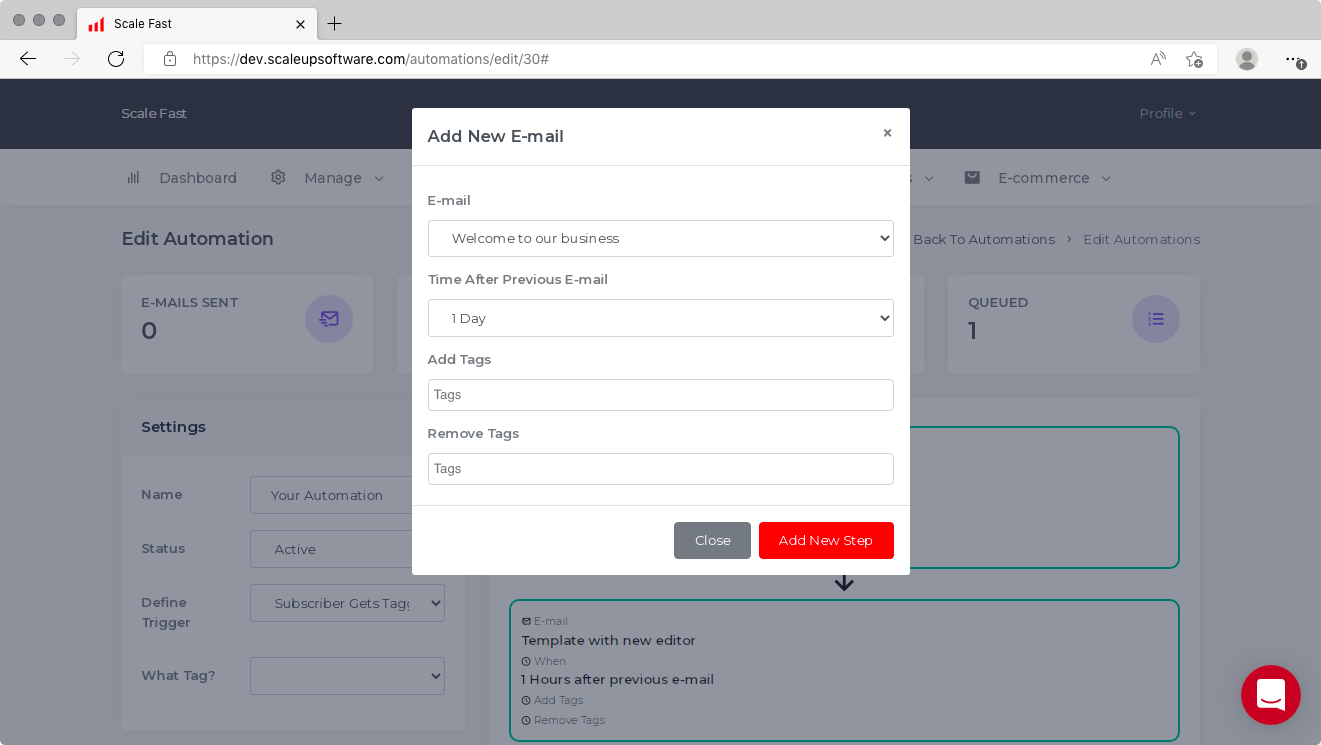
E-mail: Select an email to be automatically sent at this step of the sequence. Note that the email needs to be pre-created as a template. To create an email template, follow the instructions in the Templates tutorial.
Time After Previous E-mail: This is where you define the interval between steps in the sequence. If this is the first step, the interval will be the initial delay between the trigger you set up earlier and the first automated email. If this is a subsequent step, it is the interval between the previous email and this one.
Add and Remove Tags: Select tags to add and remove at this step. Remember that the addition of a tag can be the trigger for another automation, so this is how you can move leads within this sequence to another email sequence. Note that the tags need to be pre-created, which is explained in the next section.
Again, click on Add New Step to add this step to the sequence.
Filtering Leads Using Tags
Tags can be used to filter leads based on their progression through your email follow up sequence.
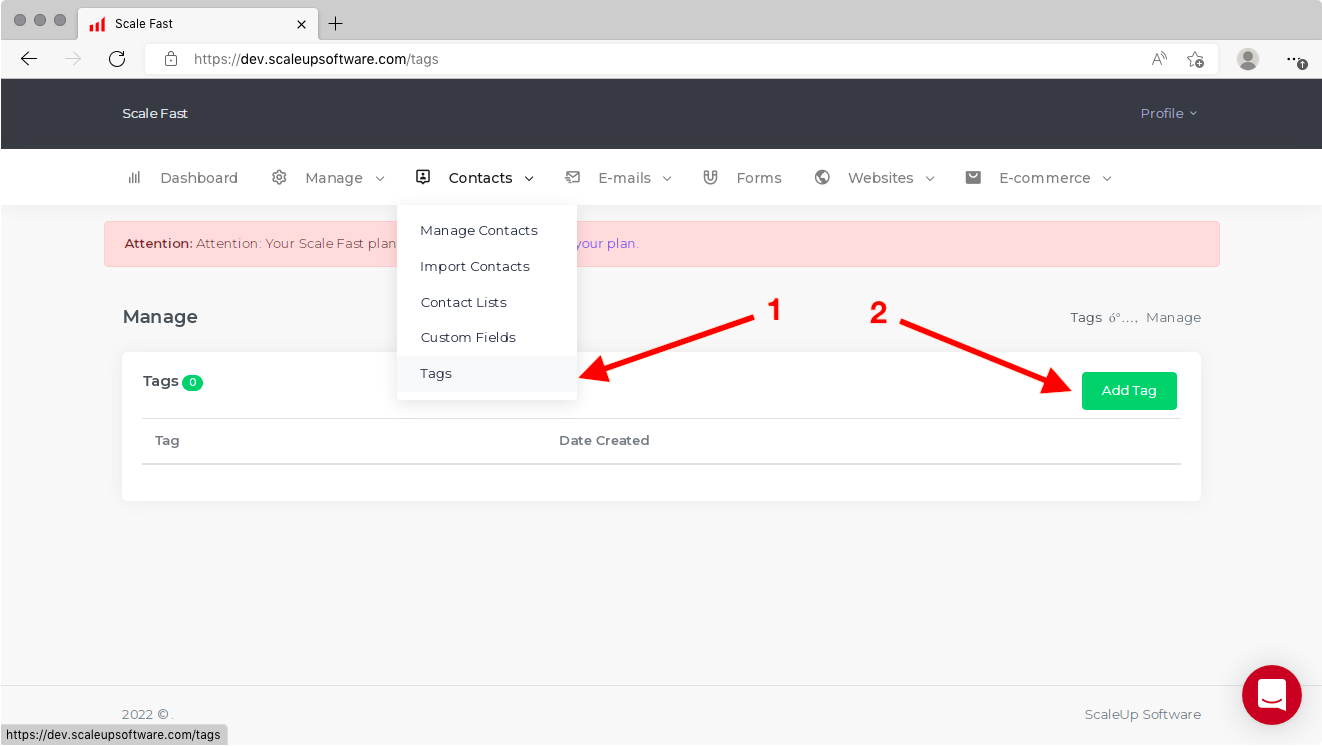
To use tags as part of an automation, you first need to create them by accessing Contacts and then Tags in the main menu. Next, click on Add Tag.
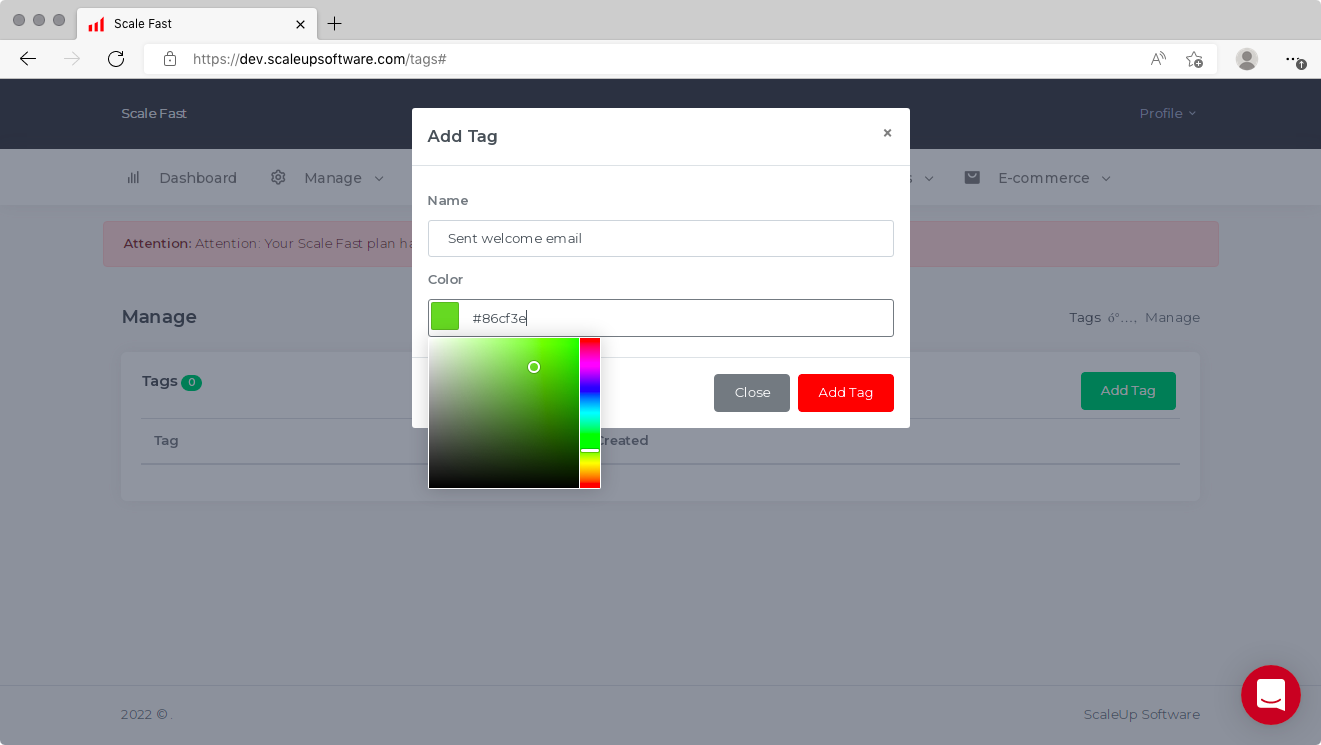
Give a name to this tag, as well as a color. This will show up next to any lead who is given the tag. Colors can be helpful for organising tags into categories, such as tags for different products or tags to assign leads to different sales reps. Then save the tag by clicking on Add Tag.
After a tag is saved, it will show up for selection in the relevant places on the Automations screen.
Your Completed Sequence
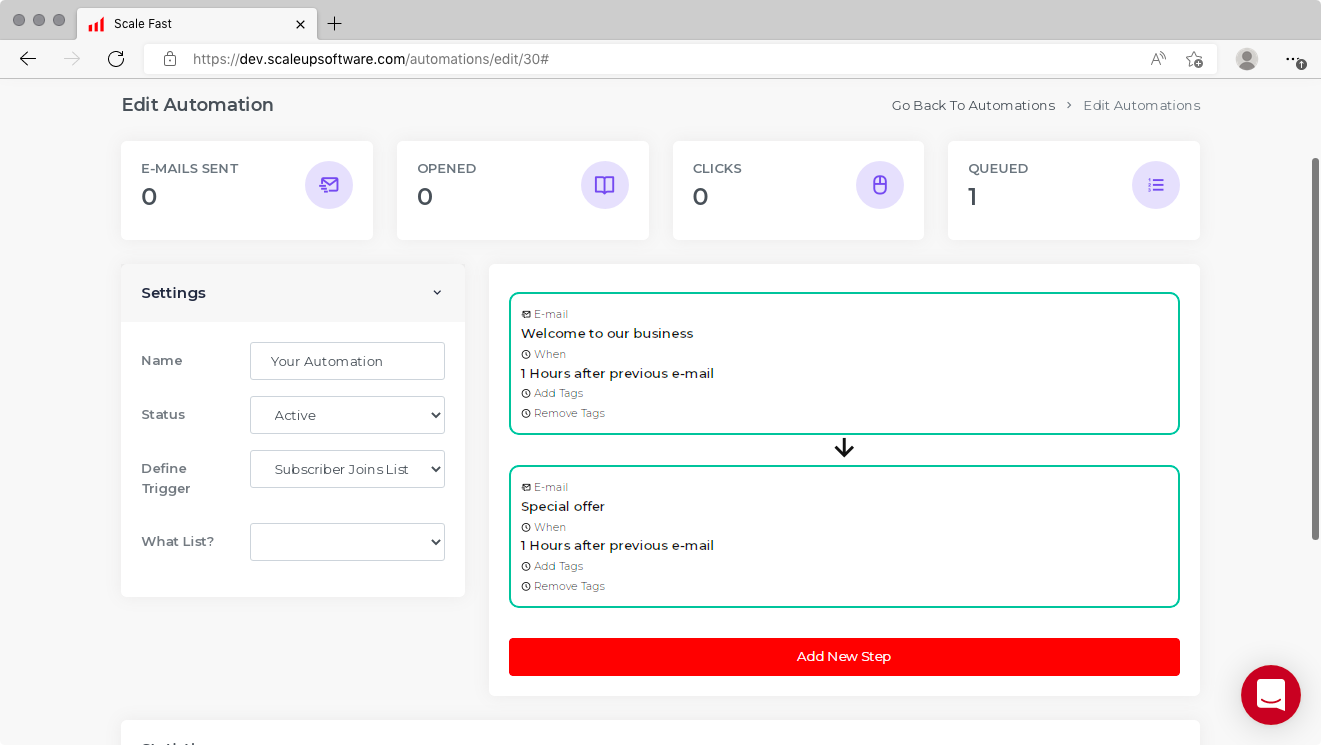
To make a whole sequence of emails, repeat the above process and click again on Add New Step. The completed sequence will look something similar to the screenshot below.
If you want a 10-day sequence, for example, add 10 steps, each with a time interval of 1 day. That way, the emails get delivered automatically with a day between them for 10 days.
Provided the automation has a Status of Active, Scale Fast will automatically deliver these emails to your customers when you want them to and how you want them to. Note that just like any other emails, you still need to set up your SendGrid integration before any automation emails can be delivered.
You can access the automations screen again to view the statistics of your email follow up sequence, such as how many leads have triggered the automation and how many opens and clicks there were on the emails.
You will also be able to view tag information on the Contact Lists screen for each contact that triggered this automation.
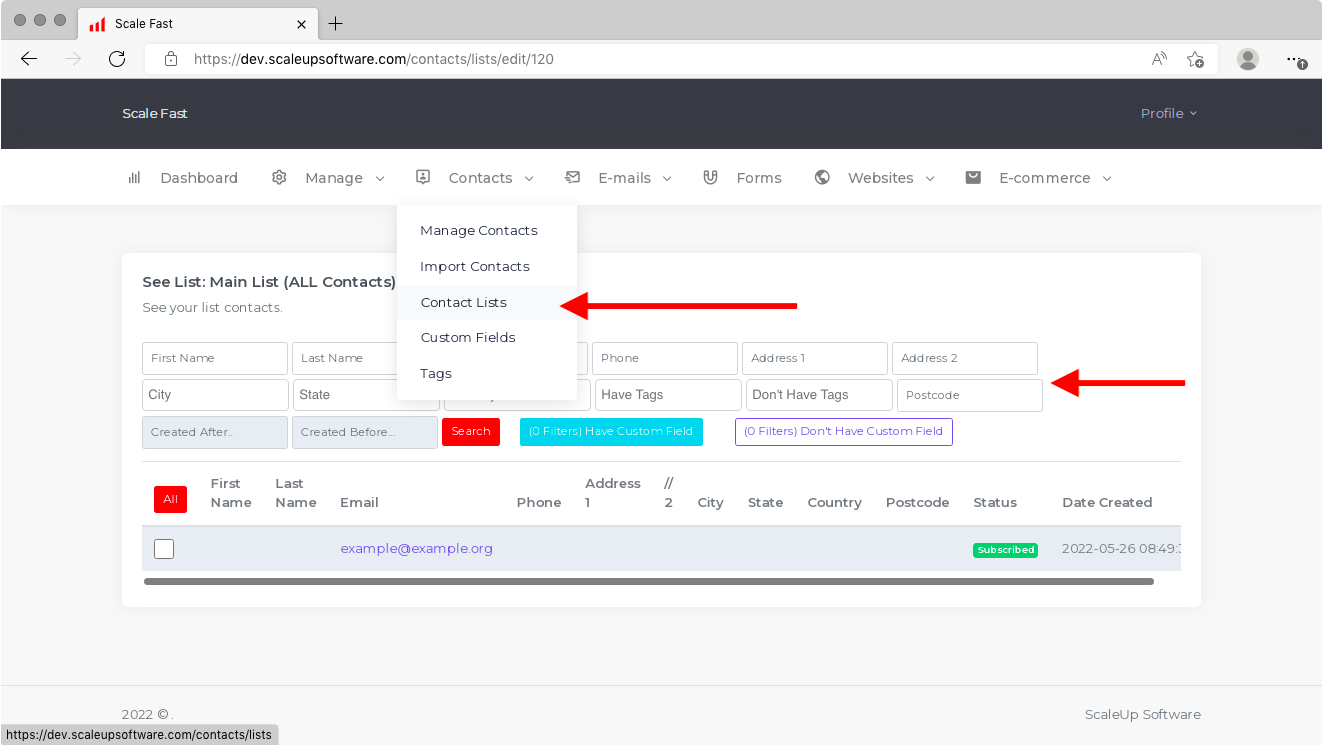
For example, if you want to know which of your contacts have completed a 10-day sequence of emails, add a tag on the final step, and this will show up in your Contact Lists. Also, if you want to know which of your contacts are currently in the middle of the 10-day sequence, add a tag on the first step and remove it on the final step, and it will show on the Contact Lists screen. Just enter the tag name into Have Tags or Don't Have Tags and you can filter the contacts accordingly.

The All-In-One Software For Running & Scaling Your Business
CONTACT
Head Office:
Level 44, B1,
Kuala Lumpur, 50450
Malaysia