
CONTACTS
How to Use Saved Searches
How to Use Saved Searches
After a contact has been added to your Scale Fast account, they can be added to a Saved Search.
A Saved Search is a special type of list. Like any other list, you can use a Saved Search as the list of recipients for emails you send out with Scale Fast.
With the type of lists covered in the Lists tutorial, contacts need to be added arbitrarily. Either they must sign up through a form on your website, or you must manually add them to a list.
With Saved Searches, you can define rules for contacts to be automatically added to the list. For example, if a certain Custom Field on a contact has a certain value, they can be automatically added to the Saved Search. This enables you to send an email to all contacts who have the certain Custom Field value and no one else, and saves you from having to add these people manually to a list.
Now that you know what a Saved Search is, the rest of this tutorial covers why and how to use Saved Searches.
Table of Contents
1. What Are Saved Searches Useful For?
2. How to Create a New Saved Search
3. Emailing Saved Searches
4. Viewing Saved Searches
What Are Saved Searches Useful For?
Saved Searches have two main useful purposes.
Firstly, if there is a subset of your contacts that you frequently want to view, such as everyone from a certain country, creating a Saved Search is an easy way to view this subset with a few clicks.
Secondly, Scale Fast allows you to send an email broadcast to all contacts who match a Saved Search, in the same way that you can email a Contact List.
How to Create a New Saved Search
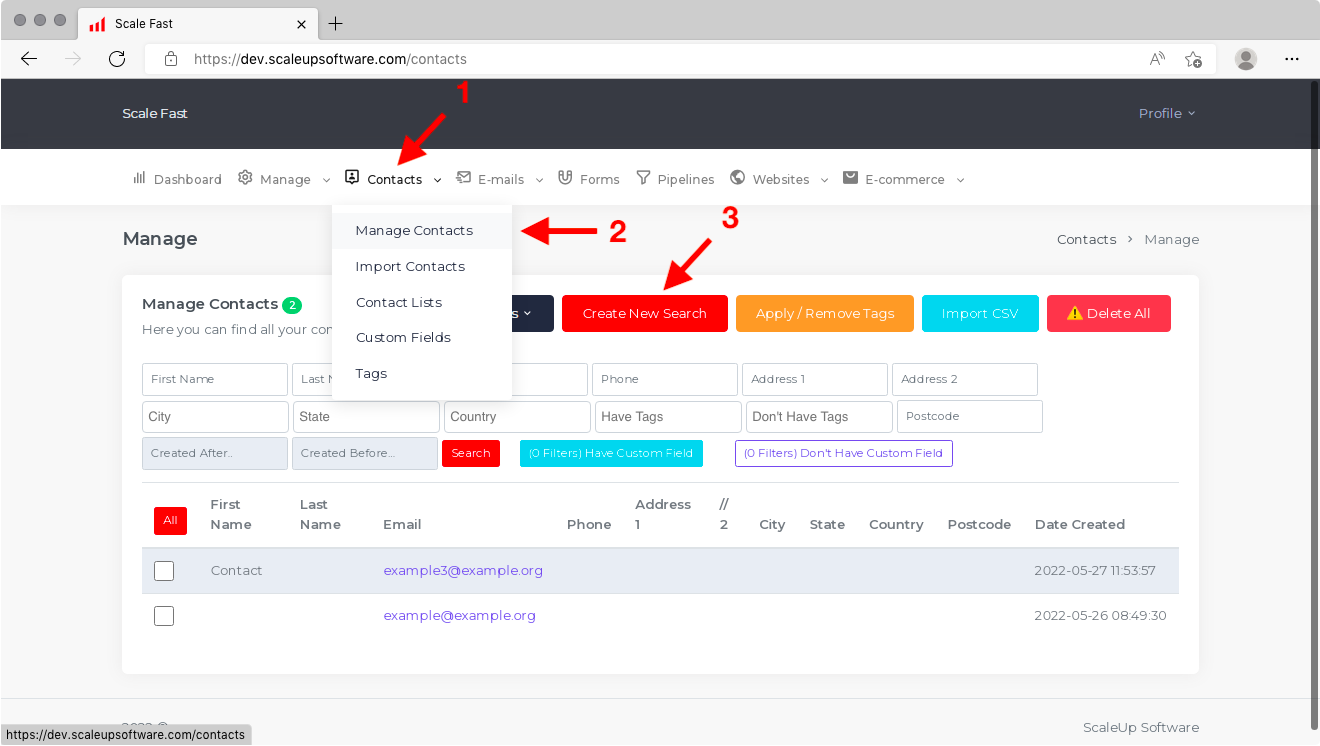
To create a new Saved Search, click on Contacts in the main menu and then Manage Contacts. Then, on the screen that appears, click on the red button labeled Create New Search.
You will see a pop-up window appear, looking like the screenshot below. This is where you will define the filters for your new Saved Search.
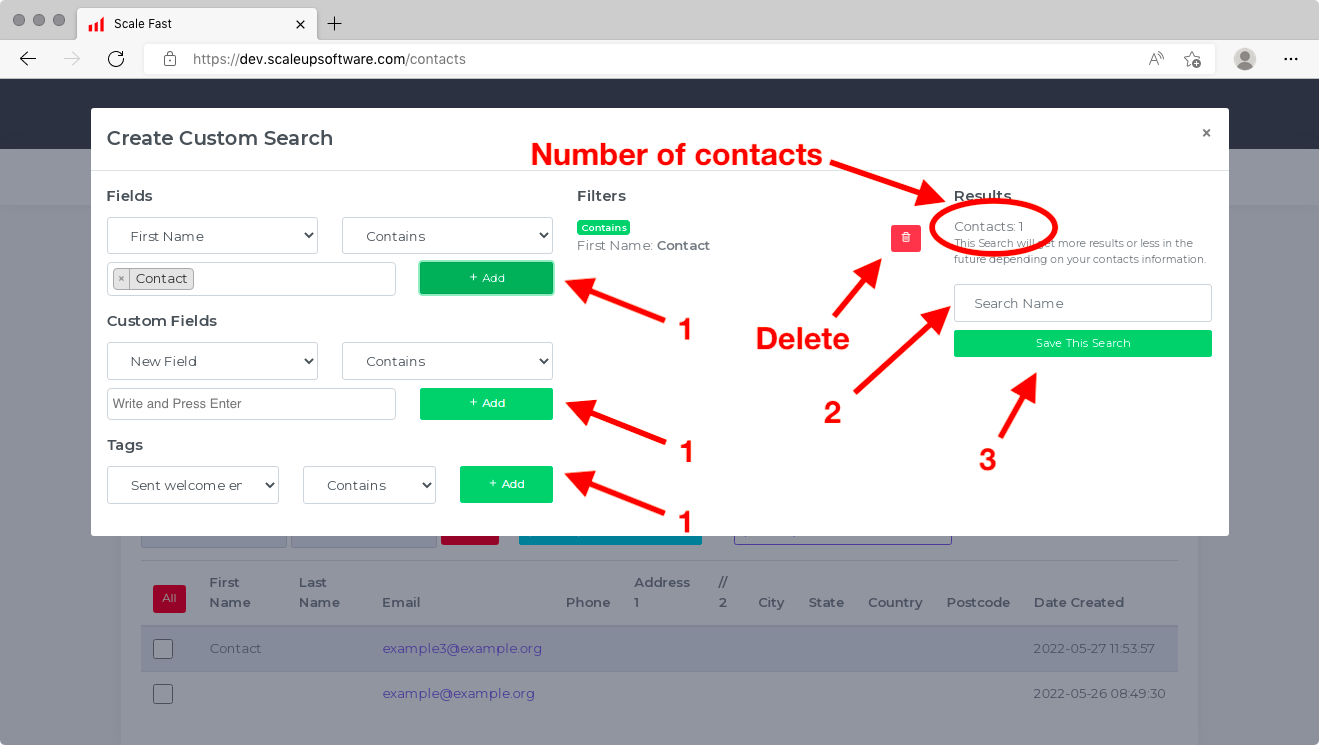
Here is an explanation of the different sections within the pop-up.
Fields: Here, you can set a filter for your Saved Search based on the value of a field. The fields available are First Name, Last Name, E-mail, Phone, City, State, Country and Postcode. In the text box, type the value you want to search by and hit enter. Select either Contains or Does Not Contain to either include a contact in the Saved Search based on whether the field contains the value or not. Then click on Add.
For example, to create a Saved Search of all contacts who are located in India, select Country, Contains and type India into the box. To create a saved Search of all contacts located outside of India, select Country, Does Not Contain and type India into the box.
Custom Fields: If you are using Custom Fields to track contact information other than the default fields, you can use this section to use the values of the Custom Fields as a filter for your Saved Search. Note that only the Custom Fields you have set up in your Scale Fast account will show in the drop-down list. To set up Custom Fields, a guide is available inside the Lists tutorial.
Once you have selected a Custom Field, the process for constructing a criterion is the same as for Fields.
Tags: Here, you can select a Tag and then select Contains or Does Not Contain to include either contacts who have the Tag or who do not have the Tag. Then click on Add.
Note that only the Tags you have set up in your Scale Fast account will show in the drop-down lists. To set up Tags, a guide is available inside the Automation tutorial.
Filters: Here, you will see all the filters that were applied. For a contact to be added to the Saved Search, they must match all of the filters. Next to each filter, there is a red button to delete the filter.
Results: This section reports how many of your contacts currently match the filters in the Saved Search. Note that if new contacts are added in the future who match the filters, they will be added to the Saved Search automatically. In other words, expect the number to change over time.
When you are happy with the criteria of your new Saved Search, enter a name for the Saved Search in the box labeled Search Name. Then, click on Save This Search.
After you save your selections, your new Saved Search will appear on your screen as follows.
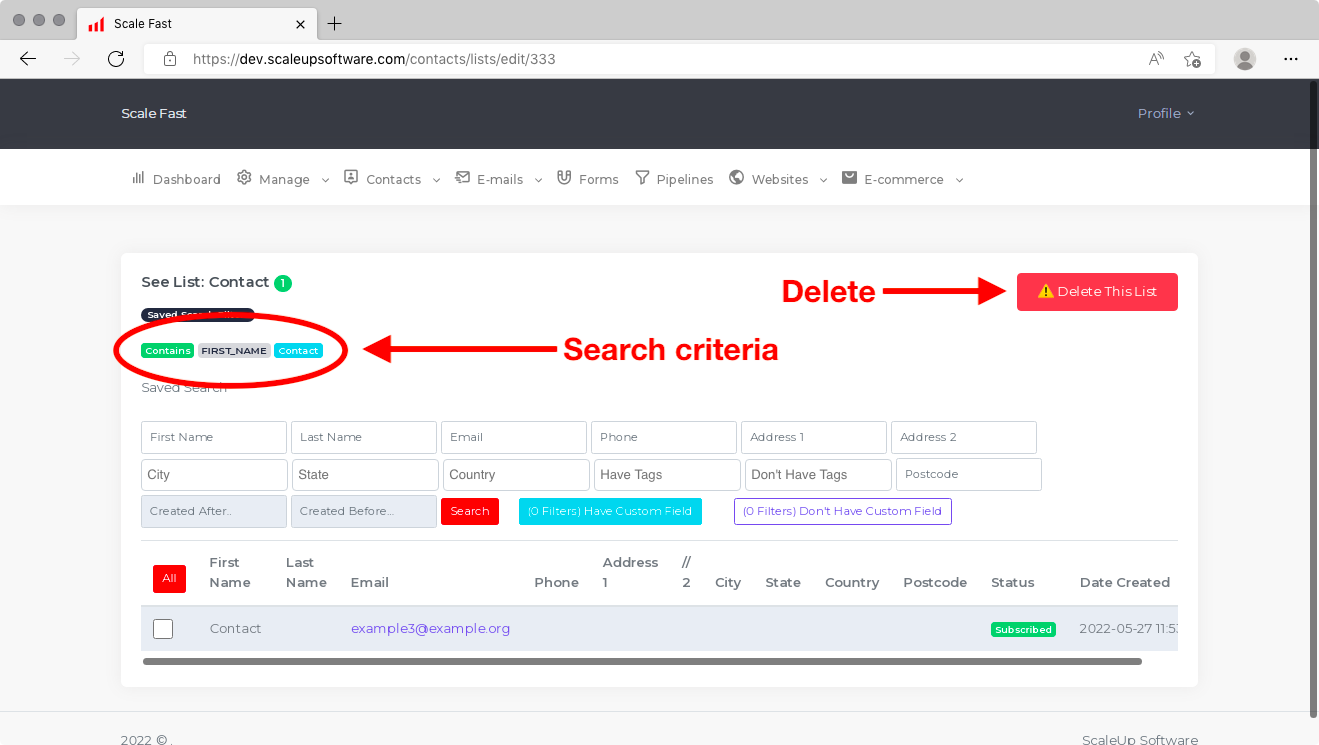
For your reference, the search criteria you defined will be printed on the screen above the table of contacts.
Inside the table of contacts, you will see all the contacts that are currently part of the Saved Search.
If, in the future, any new contacts are added to your Scale Fast account who match the criteria you set for this Saved Search, they will be automatically added to the Saved Search at that point in time.
If, in the future, the information of your existing contacts changes to match the criteria you set for this Saved Search, they will be automatically added to the Saved Search at that point in time.
If, in the future, the information of your existing contacts changes to no longer match the criteria you set for this Saved Search, they will be automatically removed from the Saved Search at that point in time, although they will remain in your Scale Fast account.
To see the full record for a contact, you can simply click on it in the same way as you would on the Manage Contacts screen. You can also use the filtering tools above the table of contacts to drill down.
There is also a Delete This List button. Clicking on this will merely delete the Saved Search itself. It will NOT delete any of the contacts within this Saved Search, and they will continue to exist on any other lists or Saved Searches they were added to.
Emailing Saved Searches
Provided that you have integrated your SendGrid account, you are able to email everyone who is included in a Saved Search, in the same way as you can email your Contact Lists.
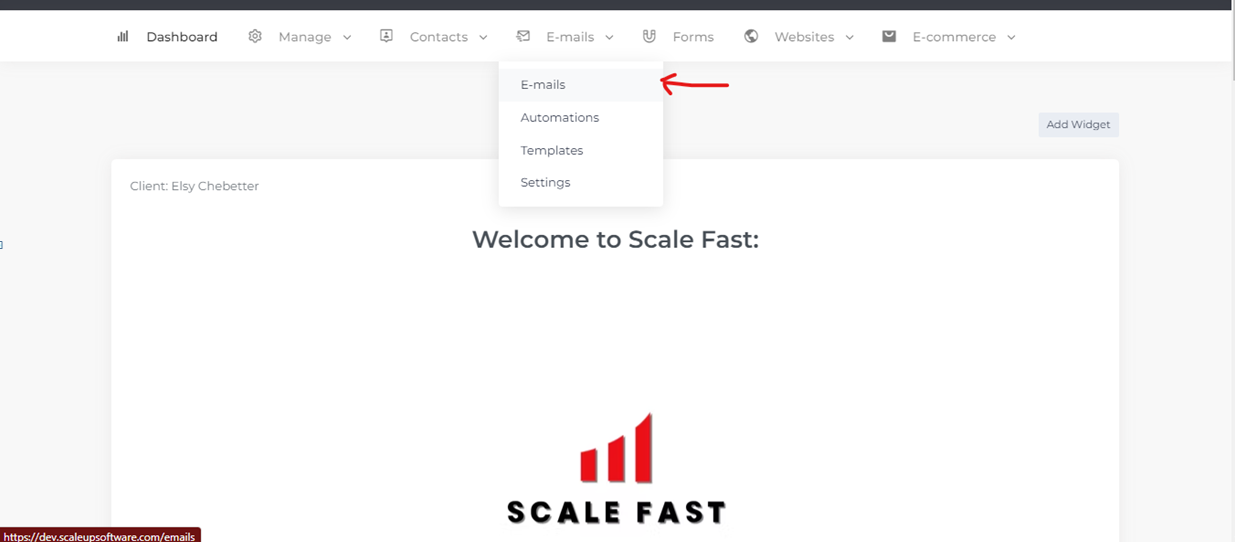
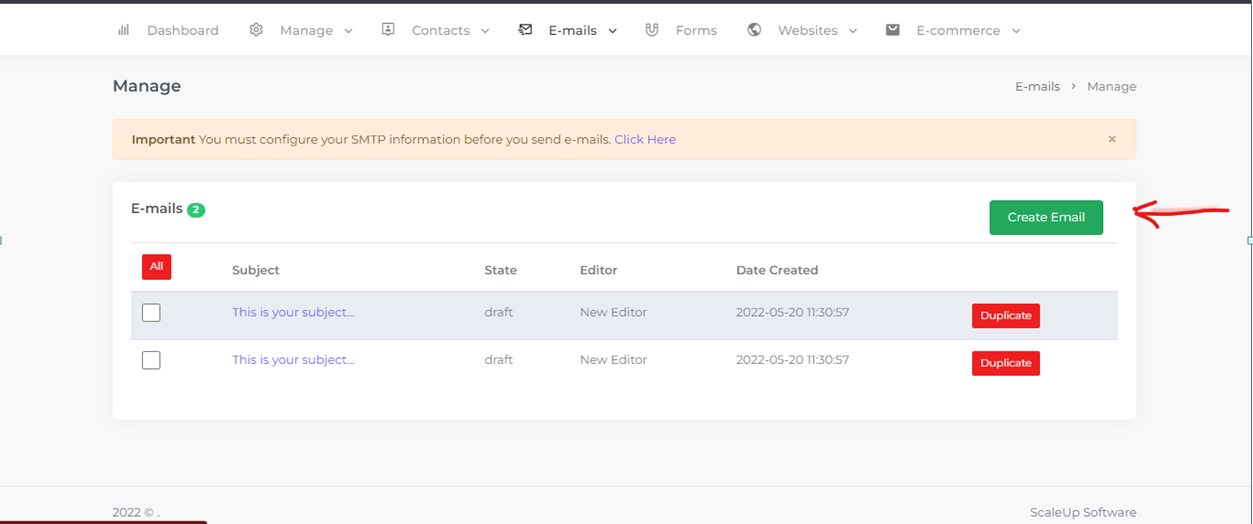
When you click on E-mails and then Create E-mail, you should notice that your Saved Searches are available as the recipient lists.
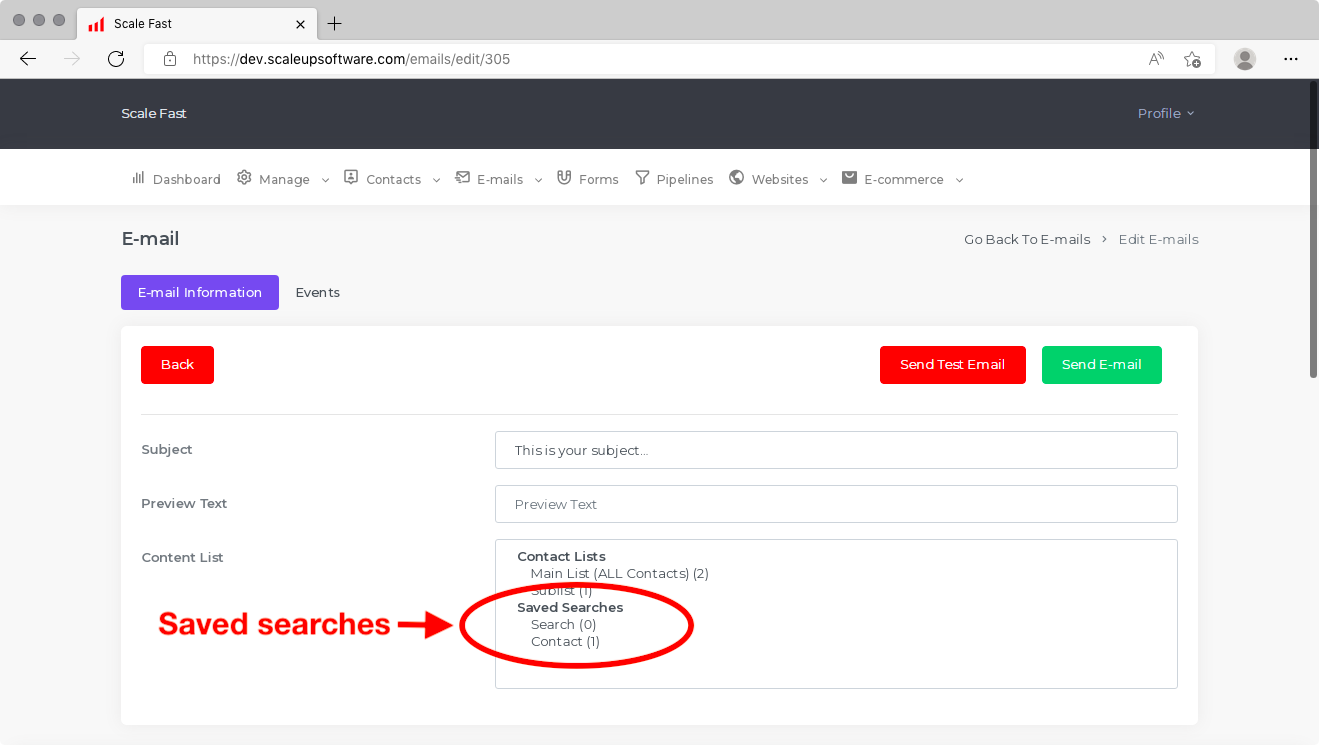
Note that the email will be sent out to all contacts who match the Saved Search at the time of sending the email. If you select the same Saved Search again at a later date, the contacts matching the Saved Search may have changed and therefore the recipients of that later email may be different.
For more help about sending emails with Scale Fast, look at the Email Marketing tutorial.
Viewing Saved Searches
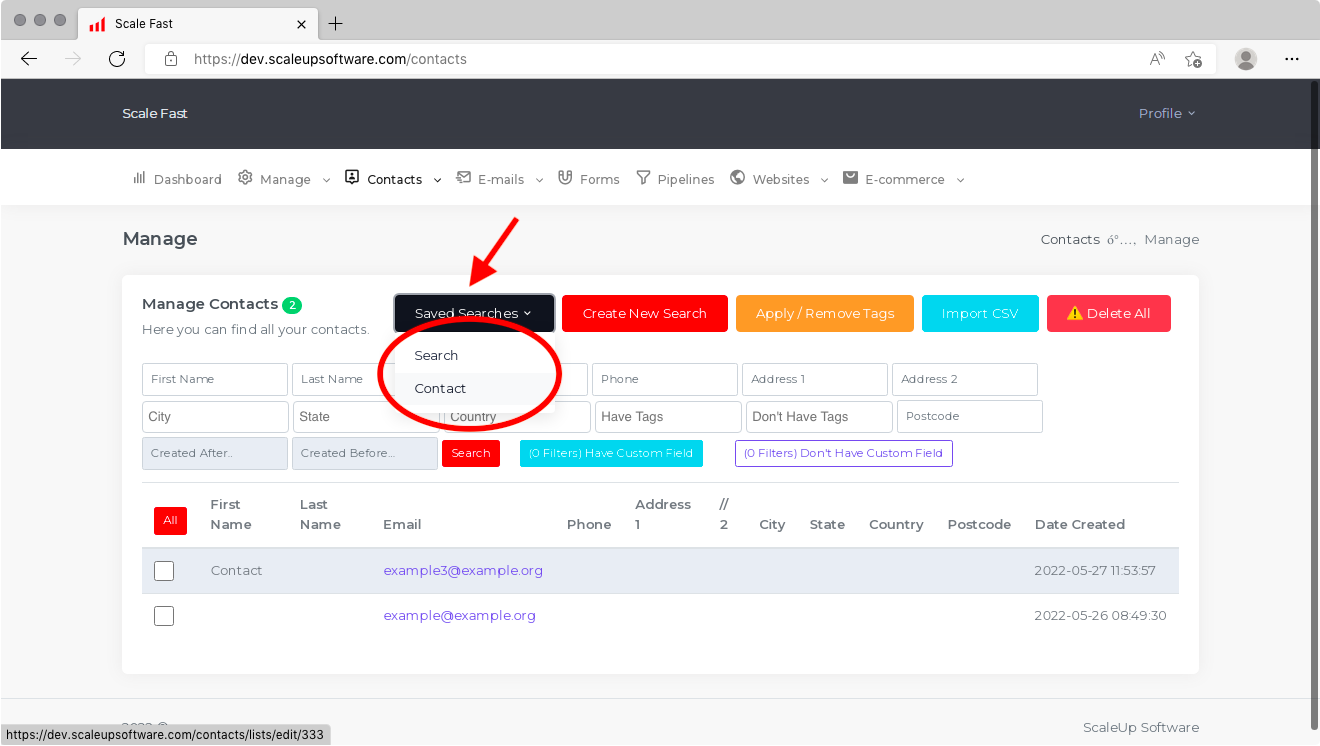
To view the contacts who are currently part of a Saved Search, go to the Manage Contacts screen and click on Saved Searches. There will be a list of the Saved Searches you have previously created. Click on whichever one you wish to view.
Because Saved Searches update automatically, this can be useful for periodically tracking how many people have been added.
Again, you will see the search criteria, a Delete This List button and the ability to drill down and view individual contacts.

The All-In-One Software For Running & Scaling Your Business
CONTACT
Head Office:
Level 44, B1,
Kuala Lumpur, 50450
Malaysia